Here’s what my “thunderboat” looks like now

Intlwaters

Help Support Intlwaters:

This site may earn a commission from merchant affiliate links, including eBay, Amazon, and others.
Also did a little work on the water lines today, and gas lines. Still got the exhaust ports turned around backwards, Can’t figure out how to set up this new gas bag. Need a routing for all the lines. I used some plastic lines for rear bulkhead up to #3, I think the frame holes are too small and pinch the tubes. So I got some plastic tube that had an Id more than 1/8 inch, and used them to run between the transom and the bulkhead number three. Then I tried to set up the flexible lines to connect these fixed lines and complete the setups. More work tomorrow. No idea how to mount the gas bag.
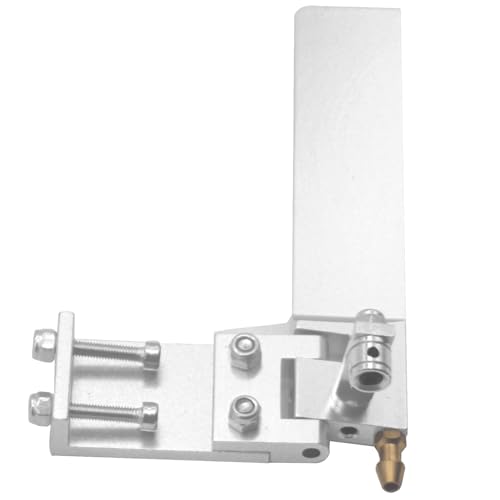
However you get water to the motor is fine. These days, I just run my silicone water line straight through the transom using some type of grommet, rubber or otherwise, or I’ll install a grommet through the “bait box” or non-radio rear compartment of my sport hydros and riggers. Then I just take it all the way up to the motor passing through bulkhead openings under the deck, In the case of my outrigger, I installed a carbon tube through the radio box, since going through the box is the only choice, and run the silicone line right through that and on to the motor. I attached a couple pics.

On the gas bag, I literally just put it in there and restrain it when necessary, only to prevent it from getting tangled up with any moving parts that might slice through the bag or the fuel lines. I’ve used zip ties, screw hooks, whatever. I think Zippkits even sells a magnet mount and I did get one but never used it. In my Lauterbach, I just stuff it up under the front deck and let it do what it wants. On the plumbing, you have a couple types of bags. The standard type of IV bag, where there’s two outlets and then there’s also bags sold by Zippkits and maybe others that have just one inlet. I’ve used both, but prefer the latter. I use a Tee. Run from the bag to one leg of the tee and then to the carb from the leg of the tee opposite of the bag hookup. The remaining leg of the tee which points up, you’ll attach a short piece of fuel line and put a fuel plug in the end. This will be where you fill from. Once filled, put the plug in and you’ll have an airtight system. Use small zip ties at all your connecting points for fuel and water. For instance, the water connection at the rudder will blow right off if you don’t zip tie it. On the two inlet IV bags, you could plug the other inlet with some rod or whatever of the appropriate size, maybe 1/4in. Then hook it up as described above. I suppose you could also use the other inlet as a fill and then the main you run straight to the carb. You would need two bag inserts in this scenario. Either way will work.

Hope this helps…

IMG_3101.jpegIMG_3102.jpegIMG_3103.jpeg
 
Ok, today was a short building day, but I got some stuff done. Received my flexible throttle hookup today, so I cut the cable to length and hooked up the servo to the carb lever. It looks great! Doesn’t take much to fascinate the senior mind.
I also had my exhaust flange on backwards, so I flipped that around and changed the routing of the cooling lines. I still need to finish off the pipe that is aft of the tuned pipe and back to the transom. I also need to put my shaft and stuffing tube in. When I get those two things done, then I’ll take everything out of the boat and start on waterproofing and painting. Also have to figure out how to locate the hole in the cowling for the spark plug.
 

Attachments

  • IMG_2915.jpeg
    IMG_2915.jpeg
    1.8 MB
  • IMG_2914.jpeg
    IMG_2914.jpeg
    1.8 MB
  • IMG_2913.jpeg
    IMG_2913.jpeg
    1.8 MB
  • IMG_2912.jpeg
    IMG_2912.jpeg
    1.8 MB
Last edited:
Thanks Rich. Your information is so valuable! I feel pretty alone here, building this boat. Some of the parts of this build just don’t have enough instructions ( at least not enough for me.). I think some steps are done in the wrong order, and although not a disaster, it makes subsequent steps more difficult than they need to be. But I read your entries, and it gives me confidence that someone who is knowledgeable about these gas hydros is looking over my shoulder and making sure that I don’t make a huge mistake. Thank you very much for all of your help and suggestions.
 
Some of us have been building so long we can take it for granite that not all know the basic items. if it seems like you not having fun, it is time to step away and ask for help. Or at least a drink and a time out. There have been days when I am so frustrated with a boat, I jsut had to walk away. I slept on the problem and came up with a better idea the next day. This is suppose to be fun. Keep up the good work.
Mike
 
For the spark plug hole, mark some reference marks on the deck of the boat. So you can figure out where it goes thru. Remember it is at an angle. Put cowl on and mark where you think it will come thru. I drill a small hole to see how close I am. Then make it wider with a sanding drum till it fits nicely.
 
Thanks Rich. Your information is so valuable! I feel pretty alone here, building this boat. Some of the parts of this build just don’t have enough instructions ( at least not enough for me.). I think some steps are done in the wrong order, and although not a disaster, it makes subsequent steps more difficult than they need to be. But I read your entries, and it gives me confidence that someone who is knowledgeable about these gas hydros is looking over my shoulder and making sure that I don’t make a huge mistake. Thank you very much for all of your help and suggestions.
I’ve been an RC Boater for a long time with a 20 year break in the middle. I used to race nitro, but when I decided to get back in, I chose gas, with the plan to ease back into nitro ( which is about to happen with my new project). This was in 2021. I had zero experience with gas so I was right where you are with questions and uncertainty. When it’s all said and done and you are ready to get wet, go out with someone familiar with running gas and RC boats in general. A local club maybe? It’ll be a much better experience.

And you’re welcome, happy to help. I see Mike chimed in on the cowl stuff. 100% spot on. Mike is a great source and always willing to help a fellow boater/racer. You’ll come across a lot of very helpful folks on here. There’s also another forum called Jim’s RC Boat Dock that has a lot of good people on it as well. I spend much more time here to be honest but nevertheless, another place to obtain helpful info.
 
Some of us have been building so long we can take it for granite that not all know the basic items. if it seems like you not having fun, it is time to step away and ask for help. Or at least a drink and a time out. There have been days when I am so frustrated with a boat, I jsut had to walk away. I slept on the problem and came up with a better idea the next day. This is suppose to be fun. Keep up the good work.
Mike
Great advice!
 
Bolstered by positive encouragement from Rich and Mike, the project today will involve getting the pipe extension into the transom. After that, if I have time left, I’ll go after the cowling hole for the spark plug. My spark plug is angled 90 degrees to the right side. Seems like it should run parallel to the keel. I gotta look at more pictures.
 
It is angled back towards the transom from the tilt of the motor. It is kind of a guessing game. You can get it close and adjust from there. Once you have the hole figured out, I think you will need a slot off of it for the boot and wire. You don't want those to be too tight. If the cowl can touch it, it will rub and cut it up real quick.
Mike
Yes, if you are saying that it angles to the back or transom of the boat, that is by design, like Mike said. This allows you to install your shaft log (the larger, shorter tube that your stuffing tube fits through), so that it can align with the collet and be installed permanently. Then the tube that you cable moves into can slide into and out of this for maintenance and allows you to make just one bend so it can meet up with the strut. If the motor wasn’t angled back, then you would need to do an S Bend in the tube to get it lined up and you’d have to permanently install the stuffing tube. If this tube gets damaged you would need to cut it out of the boat instead of just beating able to slide it out. Before you install the shaft set up, let us know. I’ll see if I can look at the instructions to see if they are straight forward enough.
 
I think I communicated poorly in entry 108. I know the the angle of the motor will impact the hole for the plug and wire, but what I was referring to was an alignment question. The boat moves thru the air more quickly with less surface area hitting the wind. If the plug wire was directly behind the cap, there would be less surface facing the wind. I know I’m overthinking this, right?
 
I think I communicated poorly in entry 108. I know the the angle of the motor will impact the hole for the plug and wire, but what I was referring to was an alignment question. The boat moves thru the air more quickly with less surface area hitting the wind. If the plug wire was directly behind the cap, there would be less surface facing the wind. I know I’m overthinking this, right?
Yeah just a bit. 😂. I don’t believe the location of the wire, whether fore or aft of the boot, creates any more discernible drag than the cowl itself. You’re fine where it is.
 
Today went pretty well. The first thing I did was to drill a hole in the transom to mount the exhaust exit tube. Success!
Then I went to the cowling and cut the hole for the spark plug. A ton of dremel, then fit, then dremel, then fit, etc., etc., etc. In the process, I found out that my needle valves needed clearance also, so more dremel and fit, dremel and fit, etc, etc, etc. Finally, it looks like it is done. I’m not sure how much clearance I need around the plug and needle valves . Then Joe wanted another test drive, so I sat him in the drivers seat.
Tomorrow, it’s time to start on the driveline….
 

Attachments

  • IMG_2917.jpeg
    IMG_2917.jpeg
    1.6 MB
  • IMG_2918.jpeg
    IMG_2918.jpeg
    1.6 MB
  • IMG_2916.jpeg
    IMG_2916.jpeg
    2 MB
  • IMG_2919.jpeg
    IMG_2919.jpeg
    1.1 MB
Here’s a couple pics. One is one of my Backlash Sport Hydros and the other is my Slingshot Outrigger. You’ll note the wire and plug standing loud and proud on both😂. The Backlash sees speeds of 75-76mph and the Slingshot has seen 80 mph.
IMG_3114.pngIMG_3115.png
 
Today went pretty well. The first thing I did was to drill a hole in the transom to mount the exhaust exit tube. Success!
Then I went to the cowling and cut the hole for the spark plug. A ton of dremel, then fit, then dremel, then fit, etc., etc., etc. In the process, I found out that my needle valves needed clearance also, so more dremel and fit, dremel and fit, etc, etc, etc. Finally, it looks like it is done. I’m not sure how much clearance I need around the plug and needle valves . Then Joe wanted another test drive, so I sat him in the drivers seat.
Tomorrow, it’s time to start on the driveline….
Everything looks fine. On those needles yeah those can be a pain on cowl clearance. I’ve actually cut them in half in the past and re-slotted them with a cutting wheel. As it stands all you can do is run it. If the boat dies because it is getting water in the carb, you might have to close up that hole around the needles a little bit. But I would go ahead and finish the build and run it and see what happens. The pic is my Lauterbach (one of them) and on this one, the clearance hole for the needles was bugging me, so I made a little housing that is somewhat aerodynamic and it’s open at the back so air can get in. It’s kind of a backwards air scoop and it keeps water from splashing around the mouth of the carb.


FullSizeRender.jpegIMG_2600.jpegIMG_2603.jpeg
 
One suggestion is to not have your tubing tuck up under the deck like that. Once you glue down the deck, it is going to suck to replace. I use 3/16 SS tubing for my water lines. The SS tubing is bent to a position that I can get to. Makes it much easier to replace. Which will happen.
Mike
 
Hey Mike
That water tubing that I have in right now is plastic tubing……..maybe that is not tough enough for these boats. With this setup, I can cut a flexible line, pull out the entire water line, and replace it super quick. Do I need a metal water line?
 
Mike
Zipp kits Missile hydros don’t have any “side panels” that close in the sides of the boat aft of the motor. So, although my water lines are under the decks and out of view, I can easily reach them from the cowl opening that runs down the center of the hull. If I did have side panels, then water line installation would get much more critical as they would be very difficult to get to. You can see in this pic that the bulkhead holes for water lines are visible and easily accessed from the 5 inch center section.
 

Attachments

  • IMG_2874.jpeg
    IMG_2874.jpeg
    693.4 KB
Today I started to put in the driveline. I took everything out of the boat except the motor. I set it up a little higher on my building table so I could get my dremel under the boat to the slot in the bottom. Then I started that slow process of dremel a little, measure, fit, dremel some more, fit, dremel some more, fit,yada, yada, yada. I then decided I needed a few telescoping brass tubes to help out. Amazon to the rescue. The goal is to setup a jig where the 1/4 brass tube will go precisely into the center of the collet. I got the jig about half done today. Then slowly add tape until it is all sealed up, and then apply epoxy with micro balloons or colloidal silica as a thickener. More tomorrow
 
At the same time that I ordered some telescoping brass tube to help line up the drive line, I ordered some 36” lengths of 3/16 brass tube for water lines. I also need to come up with some grommets to put around the brass tubes as they go through the frames to cushion them for the ride. Maybe the original water tube will work for that.
Today is a cleanup day as the ping pong table work area has become a pile of junk. Time to do the pick up, clean up, re-organize of the work area. I always get things done faster when my work area is clean. Also, I’ll get the chance to see some more of my “Man from U.N.C.L.E. “ episodes on DVD that I bought last year. Maybe a before and after picture of the work area would be good…….
 

Attachments

  • IMG_2923.jpeg
    IMG_2923.jpeg
    2 MB

Latest posts

Back
Top