Building JAE Gas Rigger Jig

Intlwaters

Help Support Intlwaters:

This site may earn a commission from merchant affiliate links, including eBay, Amazon, and others.

f41stryker

Well-Known Member
Joined
Jun 6, 2006
Messages
510
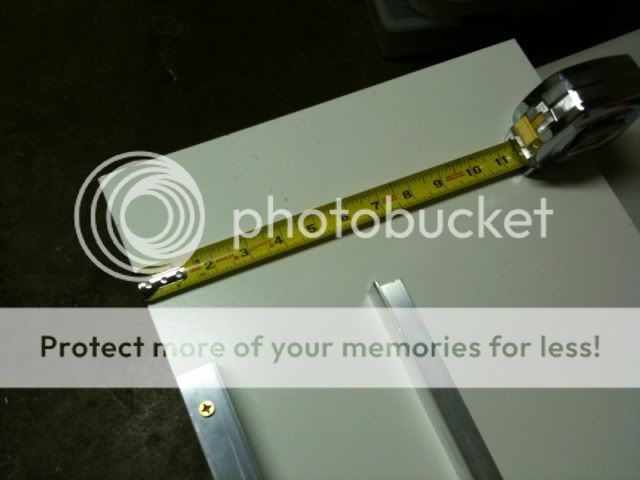
Ok-so here is my scenario this is my first kit build. I took Mr. Geraghty and Mikey's advice and got a piece of finished shelving from Home Depot (12.8" x 47.8" or something like that...basically 13" x 48"). They didn't have any pieces of 48" angle aluminum so I got 2 pieces of 1/16" thick 1" x 36" aluminum strips. I hope that'll be ok...

Measure 6" in from each end of the board and marked the angle @ every 9" and used a wood screw #10 5/8". For whatever reason I got countersunk rather than buttonhead, next time I'm there I'll get some button heads, can probably get them a little tighter. My problem is now that I won't be able to clamp the second piece of aluminum angle against the tub because my clamps won't reach across. Is there anyway to rememdy this without affixing the second piece of angle with fasteners?

Here are some pictures, I plan to do a beginner's build thread so please don't get upset if I seem post happy. BTW, I'm working off a 4' foldout table, is that going to be ok? I don't really have a bench to work off of :(
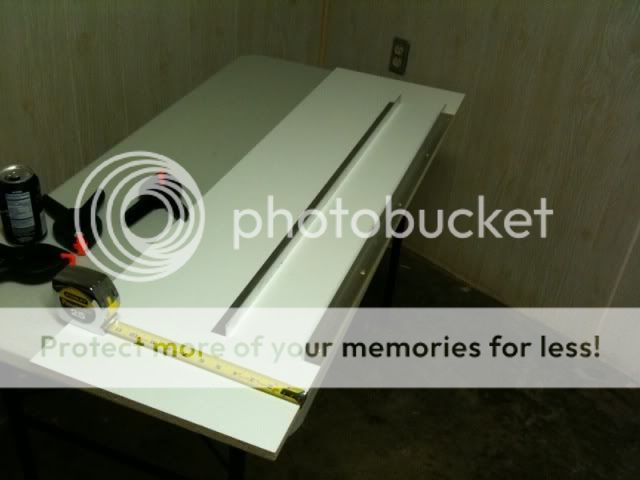
photo2.jpg


photo.jpg
 
Last edited by a moderator:
The fold out table will work just fine.....36" aluminum will also work just fine......If you are like all other builders you definetly will end up with another 4' fold out table next to you to hold all your building supplies,tools and all other assorted junk........

Get yourself a roll of paper towels,a roll of waxed paper and a big waste container..... :D :D :D you are going to need them.....

You are about 98% there with your building jig:D .....good job......

All the aluminum angle will do on the other side is hold that side of the tub straight and true...there is no need to clamp it down to the jig bottom......,

You will clamp it across to the aluminum angle,with a small bar clamp,to the opposite side that is attached to the jig bottom ......

A good tool is a good assortment of weights....I have used old socks about 1/3rd filled with shotgun shot for hold down weights....they work great.. ;)

You can get the shot at any sporting goods store that has shot shell reloading supplies.....

Now off to Harbor Freight and get yourself a good assortment of spring and adjustable small bar clamps .......

Do you remember the small 1" long pieces of aluminum angle we talked about?......You will be using them to hold all the bulkheads and transom exactly 90 degress to the tub sides....

You need to cut up about a dozen of these 1" X 1" X 1" aluminum angles.............[see attached sketch]

I plan to start building a JAE.21G2 in the next few days.......when I get it all clamped up in the jig I will take a photo and post it to the forum.....
 
Last edited by a moderator:
Great thanks Rod!!! I'll pick up some bar clamps and more angle this weekend as well as more angle. Kit should arrive today and I can't wait.
 
Here's a few tips so far.

I'm sure you read about my mistake on Mikey's build, bulkhead 3 offset to the right as viewed from the transom. (Filled and redrilled)

I seen your tub sides might have curved on you after gluing. After you get them clamped in your jig with the bulkheads installed and top and bottom skin glued you should be okay. (I did the same as Mike, placed them under a weighted board)

I finished the sponsons but a couple things you can do (that I didn't) is test fit the 5/8" dowels. Mark the access length and sand them shorter before gluing them in. It will save some time sanding them flush (dowels are a much harder wood) with the sides later. Another thing I was thinking about later was not gluing in the aluminum plugs, just using them to align everything and then pull them out to making sanding and painting easier.

I like the idea of cutting the 1" x 1" aluminum angles.

My jig is simular except I went with angled steel for durability.
 
Thanks for the heads up. I've been following that thread closely. So the hole in bulkhead 3 should be offset to the right when viewing from the front correct?
 
Glenn, I was thinking the same thing as it seems like they'd be in the way while building the sponsons plus having to cover the outside when painting. I may have some brass tubing that I might be able to use in place of them while assembling.

F41, don't forget that the hole in the tub floor is offset also.
 

Latest posts

Back
Top