First Rigger

Intlwaters

Help Support Intlwaters:

This site may earn a commission from merchant affiliate links, including eBay, Amazon, and others.

DaveyK

Well-Known Member
Joined
Mar 24, 2007
Messages
326
Hey guys,

I picked up a Firefighter 45 rigger that I'm going to put some TLC into. Since this is my first rigger, if you have any suggestions to help me out regarding setting this boat up, that would be great. I will be using the following for it:

Engine: CMB 45 purple head

Walt Barney front mount stainless tank

Steering: Hitec HS645MG @ 6V

Throttle/Mixture: HS81MG @ 6V

Speedmaster motor mount

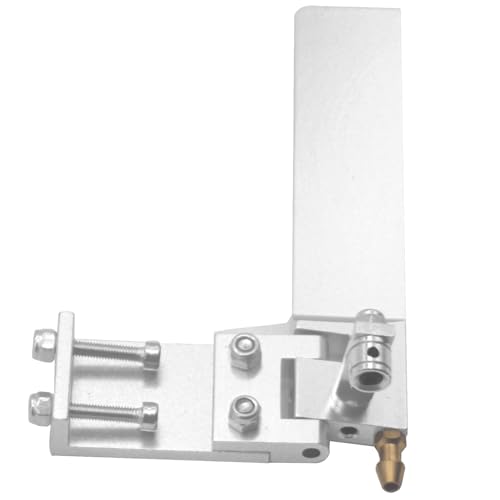
Speedmaster mini rudder

Any idea's for turn fin and prop would be welcome plus any other ideas that may help.

Thanks,

Dave
 
assuming it was built to the plans.... you should have 1 1/16" shim under both tubes. the aoa on the fronts should be 3.6 and the rears should be 1.5. the rears should be .25" off the setup table. I recommend contacting dave preusse for a turn fin. http://cdrace1.com/contactus.aspx
 
Hey guys,
I picked up a Firefighter 45 rigger that I'm going to put some TLC into. Since this is my first rigger, if you have any suggestions to help me out regarding setting this boat up, that would be great. I will be using the following for it:

Engine: CMB 45 purple head

Walt Barney front mount stainless tank

Steering: Hitec HS645MG @ 6V

Throttle/Mixture: HS81MG @ 6V

Speedmaster motor mount

Speedmaster mini rudder

Any idea's for turn fin and prop would be welcome plus any other ideas that may help.

Thanks,

Dave
Cool! Hope we get to "go around" this summer.

I run cut 1657's but 1457 or 1655's are good too. I like the OPS 6280 at 9.5" for heat racing. :D

I haven't done anything to that motor, set the head at 0.012" and run it! ;)
 
Tom, thanks for the input. There are'blocks' under each boom, correct? These are somewhat concave from I would guess is wear. Are these supposed to be like that to possibly cradle the boom or should they be square? Just to clarify, it's one 1/16" shim under each boom, not one 1 1/16" shim. I know, somewhat of a silly question.

When you refer to a set-up table, is that simply a table which is flat and level? :huh:

Terry, I'm not sure as I will race it this year. I'll see how it goes. That doesn't mean I might not be pursuaded to 'tangle' with you once in a while. :D

Keep the comments coming.
 
Dave,

Concentrate on hull set-up and props. There's no bigger gain in performance than in these areas. The rest will take care of itself.

Ron
 
Last edited by a moderator:
Dave,
Concentrate on hull set-up and props. There's no bigger gain in performance than in these areas. The rest will take care of itself.

Ron
No truer words were ever spoken. ;)

Pay particular attention to anything that touches water. :rolleyes:
 
a single 1/16" shim under each tube.... if they are concave.... well it could be wear?? normally they are flat?? setup table, sone prople get fancy but yes, a very flat table that you can use to make measurements. some have cutouts for the rudder and fin, but you can just remove them and use the kitchen table like I do.
 
I have some very good people who have showen me setup tables (Ron Zaker Jr. & David Preusse) and how to work with them. I also last season went thru a setup tutorial which was Very informative (Stu Barr & Chris Wood) (at Indy Masters Race) Thank You.

The setup table is the best thing you can do, Tom is correct kitchen table will work. From what I have learned about the setup table is the MOST Important thing is a plan of attack or a process. Always do your setup procedure the same way, what works for others might not work for you. Keep a very detailed journal of your changes .25 degrees makes a big difference and so does .005 under a boom tube or removed form under the tube. Always measure your boat the same way note your setup and refer to it with every change and note all changes and how they changed the boats performance. Once you have your boat close don't do many changes at a time do one and see if there is an improvement, too many changes at 1 time can really mess ya up. This is somethings that have worked for me .

Paul
 
Thanks guys, all very good advice and I will make sure to follow it.

Next question. I spent the day sanding down the tub and sponsons, I used a table to set the tub flat with only the rear sponsons and the nose of the tub touching the table. What I noticed is that the rear sponsons are attached using a double sided tape. Is this the norm? The other thing I noticed is that one rear sponson was set at a different height. Is this normal? I would think that at the speeds in which these run, having it square would be paramount. Am I correct in thinking this way?

I removed the rear sponsons and need to know at what height should the horizontal top be down from the top of the tub and how should they be attached? Epoxy?

What is the depth on the strut from the bottom of the tub?

Thanks for the help,

Dave
 
Thanks guys, all very good advice and I will make sure to follow it.
Next question. I spent the day sanding down the tub and sponsons, I used a table to set the tub flat with only the rear sponsons and the nose of the tub touching the table. What I noticed is that the rear sponsons are attached using a double sided tape. Is this the norm? The other thing I noticed is that one rear sponson was set at a different height. Is this normal? I would think that at the speeds in which these run, having it square would be paramount. Am I correct in thinking this way?

I removed the rear sponsons and need to know at what height should the horizontal top be down from the top of the tub and how should they be attached? Epoxy?

What is the depth on the strut from the bottom of the tub?

Thanks for the help,

Dave
Dave,

I'm not familiar with that hull, but from what Tom is suggesting the set-up shouldn't be a huge deal. I use a 3/8 hunk of glass for my set-up table and a digital protractor like Terry suggests. There's a real trick to getting the hull square and all sponsons touching down at the same time. Alot can change just from too much torque on the booms or not having the mounting surfaces true where the booms are mounted. Again, attention to detail is most important. If you need help don't be afraid to call. I'd use nothing more than a stock 1457 or equal until you get the boat set the way you want it. Then it's prop, pipe length and water etc for tuning. Good luck!

Later, Ron
 
Yup, using body trim tape seems to be the norm, makes it easy to fix a rear if it gets hit and of course set-up options are endless. You can get the tape at Home Depot (used for mounting home numbers etc.) or if you want the best that's out there try this:

http://products3.3m.com/catalog/ca/en001/a...ler/output_html

Here's some info from Marty's site showing how to do it:

http://rcboat.com/setup.htm

I assume from Tom's info the strut should be flat on the table with the tub level, fronts at 3.6* and rears at 1.5 (both measured near the TE). Rears should be 1/4" off table but that prolly works better with a 14 series wheel, I like them on the table running 16 series as they lift more (rear drops less in the corner making it through smoother). :)
 
Last edited by a moderator:
Terry,

Thanks for the additional info! The picture just got a lot clearer for me. :rolleyes:

Dave
 
How I did my FF45.

1st, put the shims under the boom tubes as Tom Suggested, & Leave the rear sponsons, rudder blade and turnfin off at this point. Sit the boat on a sheet of glass or similarly flat surface, and adjust the strut down so that the top of the tub at the radio box lid is at 1 degree to the glass sheet etc. (transom higher than the nose).Tighten strut.

Then get your rear sponsons prepped for the double sided tape and put down some 1/8" ply sheet on the board either side of the strut for the sponsons to sit on. The top of the rear sponsons should be at 0 degrees and the back edge of the top skins level with the transom when viewed from above. Visit My gallery Stick them on like this whilst sitting on the ply sheets.

That should get you started.

Turnfin - another vote for David Preusse "CD Machine" turnfin for a Hawk.
 
Last edited by a moderator:
I think Dave is going to need to no the ride hieght of the tub when the boat is sitting flat on the table , this would be the measurement between the table and the bottom of the tub.
 
Back
Top